Painters Winnipeg | Madani Group Painting And Stucco Coating
  • Home
  • About Us
  • Estimate
  • Service
    • Stucco Painting
    • Exterior Painting
    • Stucco Repairs
    • Commercial Painting
    • Interior Painting
  • Gallery
  • Contact
  • Blog
ARTICLES & RESOURCES
Our Blog Posts

Which Rooms You Should Paint First

12/6/2018

 
Picture
​


​Getting an entire interior paint job done can be pretty daunting; there’s a lot of work that needs to be done, it’s going to take quite a bit of time, and during the painting, you won’t have easy access to the rooms being painted. Obviously, it’s a job worth doing; new paint will make your house feel like a new home, and can drastically increase resale value. In order to alleviate the burden on you, here’s an order we propose for having each section of your house painted.
 
First, get the bedrooms and bathrooms painted. These are spaces designed for relaxation; most folks will even get them painted softer colours in order to create a calming effect. You want them done so that when the rest of the painting is being done, you have a place to unwind and relax; the process can err on the stressful side, so being able to lie down on your bed after a hard day’s work and relax is definitely worth it.
 
The kitchen should be the next stop on your painting list. That’s because, well, people need to eat. You might notice a trend here, because people also need to sleep and go to the bathroom; basically, if it’s an essential part of your day to day functioning, get it painted first. You don’t want to be forced to eat out during the end of your house painting experience, and having it done early lets you shop for groceries properly once it’s done; if there were any delays during kitchen painting, you wouldn’t want your produce or other foods going bad, so plan accordingly!
 
The next step is the living room; this area is usually pretty spacious and well used, so it’s worth painting so people can go back to spending time together instead of feeling isolated in their rooms. This is usually the place with the most furniture, so you’ll want to have a space to move it all; preferably in one of your less used areas that hasn’t already been painted, like the laundry room or the basement.
 
On that very note, the least used rooms should be painted last; the laundry room, the furnace room, and the basement. Should there be any accidents when moving the furniture into these rooms, it’s not as big of a deal, because they haven’t been painted yet; repair work can be done before the painting begins. Additionally, the stress of a minor home renovation (or any other large project) is usually most keenly felt towards the end; frontloading that stress by having the most used rooms painted first, then having a place to live comfortably while the least used rooms are painted, is a very good idea.
 
The best way of alleviating the stress of a project is to have a professional handle it; they’ll work faster and better, freeing you from a lot of the worry that comes along with a big project. Winnipeg painting companies are available to tackle both interior and exterior painting; the best ones will have a cohesive strategy about which rooms to paint first, and they’ll discuss all of the details of their plan with you, to make sure you have as stress-free an experience as possible. 
Read More

A Brush With Destiny

11/29/2018

 
Picture


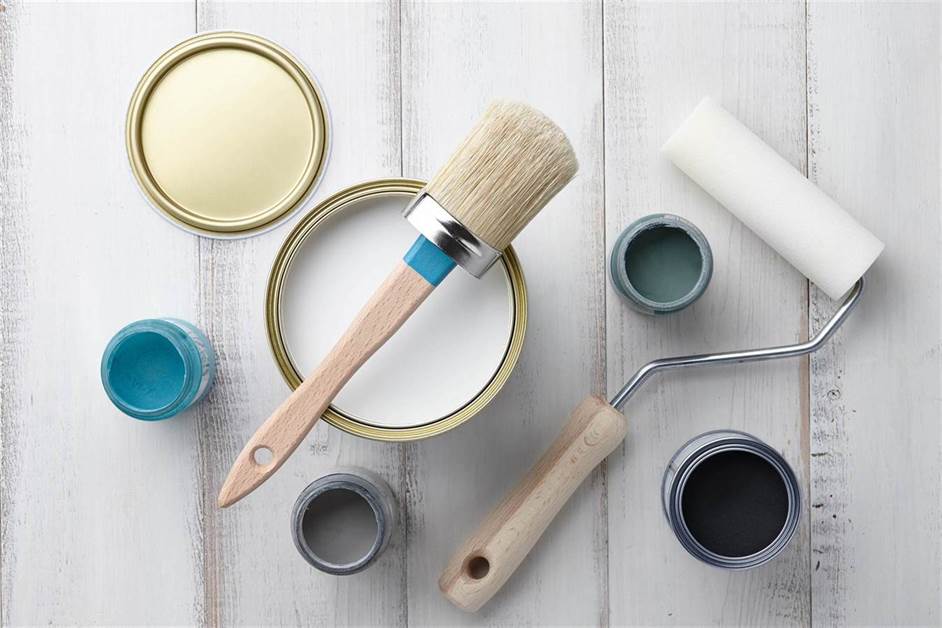
​When you’re painting a house, the focus is, unsurprisingly, on the paint. The colours, the glossiness and the thickness are all running through your head while you plot your picture perfect home. There are so many factors that go into a high-quality paint; it gets all the love. Meanwhile, the real workhorses of the project, the ones willing to get messy in the deepest cracks and crevices of your siding, they’re neglected! We’re talking, of course, about paint brushes and rollers, the unsung heroes of any painting project; we’re here to give them their well-deserved time in the sun. That is, of course, assuming they’re not covered in paint; we don’t want anything drying on them!
 
First, the difference between the two. Obviously, paint rollers and brushes are different; you’ve seen both, but what are they both good at? Paint rollers are good for long, smooth surfaces; think walls on the inside of your house, ceilings and doors. Paint brushes, meanwhile, are used for areas where more precision is needed; the sidings of most homes are painted with a brush, because the surfaces are often constructed out of multiple parts that create a wide variety of textures with divets and bumps.
 
Brushes come in a variety of different types. Animal hair brushes are especially useful when applying oil-based paints, whereas nylon and polyester brushes are better for latex and other water-based paints. They come in a variety of sizes as well; smaller brushes are best for trim and windows, while larger brushes make painting the side of the home a lot faster. There’s also different angles the brush can end in; square ends are useful for applying paint over a flat surface, while angled brushes are handy for trim, hard-to-reach areas and windows.
 
Paint rollers are just as varied as their brush cousins, despite their less storied history. Paint rollers are covered with a nap, the woven material the paint is actually applied to. This nap can vary substantially in thickness; heavier naps are good for textured surfaces, because the large amount of paint they can accumulate can make its way into the crevices of surfaces like stucco and brick. Thinner naps, conversely, are handy for smooth surfaces where you don’t want thick layers of paint. The size difference between paint rollers isn’t as extreme as with brushes; they basically come in either 9 inch or 4 inch long varieties, where the longer ones are better for large walls and the smaller ones are good for doors and cabinets.
 
At Madani Group, we’ve got respect for these unsung heroes of painting; that means we’ve developed techniques using each brush and roller for the appropriate job, meaning a faster, higher quality project for you. High-quality house painting can’t happen without the right rollers and brushes, and for that, we salute them. 

Read More

How Weather Affects Paint

11/22/2018

 
Picture

​

What do professional painters and a small, cheeky, bear-harassing girl from a children’s tale have in common? They like it when conditions are just right: not too hot, not too cold. Painters, in some sense, are even fussier (though they won’t enter into your home uninvited); they want to make sure things aren’t too dry or too wet, too windy, too sunny; the weather has to be pretty perfect to make sure paint adheres well. Weather has a dramatic effect on painting, so it’s important to know what conditions your painters are looking for.
 
The temperature outside can affect paint pretty dramatically, given it’s liquid-to-solid properties. When the weather is too cold, paint will thicken, making it harder to apply; it will also dry more slowly, because the atmosphere can’t absorb as much moisture, and this can result in cracking. Heat, conversely, can cause a host of different problems with your paint job. Wood or other surfaces that are too hot can cause paint to blister when applied. Hot paint also has a tendency to dry too fast, the opposite problem we had with our cold paint; it becomes hard to spread, and can dry on the roller if conditions are particularly warm. Temperature fluctuations on the day you’re painting can also be problematic; if conditions are perfect at 15 degrees, but the overnight low is -5, the lower nighttime temperatures may sabotage your efforts.
 
Humidity has a pretty dramatic effect on paint as well; just imagine painting in the rain, and you’ll be able to appreciate how futile it is to paint when not even your sweat will evaporate because of the humidity. For the same reason paint takes a long time to dry when it’s cold, it will dry slowly when it’s humid; the air can’t absorb the water that wants to evaporate. Readers with excellent predictive abilities will know what’s coming next in our narrative: conditions that are too dry will lead to the paint drying very quickly, and the paint won’t adhere properly to the surface.
 
The sun and the wind will also lead to problems with your paint. The sun’s UV rays can discolour paint, even on colder days; it’s the intensity of the sunlight, and not the heat, that creates this effect. The wind, on the other hand, works the same way as a dry or hot day; it helps the water in your paint evaporate quickly, which might make paint stick to rollers or adhere poorly to your home.
 
The optimal conditions for painting, then, are quite specific: a day that’s overcast, but with no chance of rain, very little wind, a daytime high of around 20 degrees and a nighttime low of around 15 degrees. Obviously, it’s impossible to find these conditions for most of the year, so the best exterior painting services have adapted their techniques and tools to work under most circumstances; just don’t expect anyone to paint your home’s exterior in the rain! 

Read More

Professional Wall Painter Methods You Should Know

11/15/2018

 
Picture


​We’ve come a long way from those times of grinding pigments with a pestle and mortar to create paint; a period when the only painted homes in the United States belonged to the rich.
 
Do you want to freshen up the appearance of your house?
 
In this century, you do not have to be rich to have a painted home. Paint involves one of the most budget-friendly methods of updating or changing the appearance of your home.
 
What are the methods which will result in a professional-appearing project? What are the methods that expert wall painters utilize to add visual interest? Do you want to change the appearance of your house without having to make a massive financial investment? Take a look into the following five professional wall painter methods:
 
Clean and Prep the Surface
 
Patch cracks and holes with joint compound. Permit it to thoroughly dry. Wipe any of the excessive drywall compounds.
 
Most importantly, utilize a primer to paint all of the patchwork. Skipping that step leads to visibly blotchy, dull spots on the surface of the ceilings and walls.
 
First, Paint the Trim
 
Professionals utilize a certain order: paint the trim, then the ceiling and finally the walls. This method permits you to get paint upon the trim without having to be extra careful.
 
As the trim paint dries, with painter’s tape, tape it off in order to keep from getting wall paint on it. Then, paint the ceiling, and finally, the walls.
 
Roll the Full Wall Height
 
This method will assist you in keeping a damp edge. That is important. If the paint starts to dry, you might wind up with uneven layers because of a buildup of paint.
 
Start close to the edge and push your roller up and down your wall, from trim to the ceiling. With every stroke, move over a little.
 
Keep in mind to frequently reload the roller. You do not want a dry roller. It might cause paint to pull away from your wall.
 
Utilize One of Many Decorative Painting Ideas
 
As you have done the prep work and painted the wall, it’s possible to select from any number of decorative painting techniques.
 
There’s a big variety of stencils in the marketplace. It’s possible to purchase metallic paint and utilize it to paint an accent wall. A striped wall never goes out of style. Polka dots may add flare and are fairly simple to do yourself.
 
Some methods may provide the walls a textured appearance:
 
  • Rag Rolling – very textured, subtle appearance
  • Sponge Painting – result is a dynamic texture
  • Color Wash – adds depth and texture
 
Cut Painter’s Tape When Fully Dry
 
You do not want to discover this the hard way. If you simply pull off the tape from the wall, you might pull the paint along with it.
 
It’s better to take a utility knife and cut, beginning in a corner. Be certain that the paint is fully dry so it’s possible to make a clean cut.
 
For more information on the best interior painting services contact Madani Group today!


Read More

What Should You Know Before You Hire a Home Exterior Painter?

11/11/2018

 
Picture


​ 
Do you want to paint the outside walls of your house but do not know where you should start? Hiring a professional painter may be the right first step!
 
Painting your exterior walls is a difficult job because they require more work than simply adding a couple of fresh layers.
 
You ought to get the surface ready for painting by cleaning all accumulated dirt and repairing any damages or cracks to the walls.
 
Keep on reading to learn how to employ a painter for your property’s exterior walls and what you ought to know before you do.
 
If you aren’t up for a do-it-yourself painting job, hiring experts is your best option.
 
Check below for the five important things you should know before sealing the deal.
 
Meet with Painters Before you Hire Them
 
Do not hire a painter before you have first spoken to them in person.
 
Hold a short meeting with your contractors to talk about the terms of the project, the budget, expectations, as well as their delivery.
 
If you enjoy how they conduct business, it’s possible to proceed with hiring them for the job. If you receive unprofessional vibes from them, it’s best to move on to your next choice.
 
Be Clear on the Scope of the Project
 
Before hiring painters, you must talk about the scope of the project with them.
 
Will you require an easy repainting job with a single color or would you prefer to make the walls stand out using color combinations or patterns?
 
Will you clean and prepare the walls for painting or should the painters? Who will do the cleanup afterward?
 
Go through all details to avoid misunderstandings. Note that a few extra services might cost you additional money.
 
Be Clear on the Budget of the Project
 
Professional home painters are not cheap because they perform a job for which you do not have the materials, skills, or time.
 
It’s why you have to set a clear budget and speak with the contractors about the services they’ll be offering.
 
Discuss all unforeseen expenses and where they might stem from.
 
High-quality workmanship and materials cost more, yet where you live also can influence the rates of labor.
 
Check Reviews and References
 
Before hiring a professional painter, ask all family members and friends for suggestions.
 
One other option includes going on the internet and checking reviews from other consumers. It’s a surefire way to check who you are doing business with.
 
Always select contractors who have proven experience. Occasionally, larger companies that have years of expertise will do a worse job than a family-owned, small company which concentrates on satisfying their customers.
 
Check Their Insurance and Permits
 
Never employ a painter without first checking their permits, credentials, and insurance paperwork.
 
Always choose legitimate contractors who are able to demonstrate their experience, and do not be afraid to ask them a lot of questions.
 
These are layers of extra protection in the instance of an accident or if you aren’t satisfied with their work.
 
For more information on our high quality exterior painting services contact Madani Group today!


Read More

Why Does Your Fall House Maintenance Checklist Need to Include Exterior Painting?

11/7/2018

 
Picture


​Fall: it’s upon us now, and that means the rush to finish those jobs which improve your curb appeal, increase the value of your home, and (more importantly) safeguard your home all winter, is in its last leg. You may be hesitant to invest in a fresh project with the cool weather quickly approaching; however, believe it or not, your house actually will be best served if you complete those tasks sooner than later.
 
Repairing peeling paint and broken stucco, as well as removing mildew and dirt from the exterior of your home will help safeguard your property during the winter season. Those repairs are more than aesthetic; they guard your investment.
 
It may be difficult to discover what you should prioritize as you put together that fall house maintenance checklist; therefore, we have out together a few fall renovation tips that will spark your creativity and assist you in figuring out what must get accomplished. Check this maintenance checklist out which will update your house and keep you protected, cozy, and warm all winter.
 
Fall House Maintenance Checklist
 
There are 4 major aspects which could cause everlasting damage to your house if you do not prepare accordingly. As you put together your fall home renovation checklist, be certain to prioritize them:
 
Weather damage: If sections of your property’s exterior are bare, as well as exposed to the elements, it might cause extensive damage as winter weather arrives. Making repairs and repainting protects the exterior of your home, and ought to be at the top of the list.
 
Dirt: As grime and dirt accumulate, they’ll stain the exterior finish, and make it look unattractive and unkempt. Additionally, dirt may pit and otherwise poorly impact the finish, and leave your house vulnerable to more damage. Add pressure washing to the fall checklist.
 
Mildew and mold:  Mildew and mold will spread out if the conditions are right, and dark, cold winter days will offer the state it requires to get inside the building materials of your house. Staining or repainting and cleaning your patio, deck, and home ought to go on your list to both protect from and prevent mildew and mold.
 
Dilapidated exterior materials: Crumbling, broken stucco, warped siding, or peeling paint are more than just aesthetic problems. They may promote leakage beneath to the structure that’s supporting your house.
 
Pressure Washing
 
Pressure washing may remove dirt, mold, and additional debris before the winter. Autumn is the ideal time to get this done: First off, the rainiest season is done, meaning there’ll be less soil splashing onto your house and outdoor living spaces. Secondly, it is not yet too cool to safely leave surfaces damp.
 
All pressure washing projects aren’t the same; it’d be a mistake to attempt to power wash your siding the same way you may power wash concrete, for instance.
 
For more information on our painting services contact one of the best Winnipeg painting companies, Madani Group, today!


Read More

Why Should You Use a Professional Kitchen Painter for Your Next Project?

11/3/2018

 
Picture


​Most do-it-yourself projects aren’t completed in one weekend. Your kitchen painting job is one of these. Do yourself a favor. Forget about the do-it-yourself approach and employ a professional kitchen painter. Why should you hire an expert kitchen painter? Here, we list 7 great reasons to turn this project over to the professionals.
 
Save Time
 
Painting a kitchen isn’t an easy and quick project. It’ll require significant prep work and planning before you ever open up a can of paint. The longer it takes, the longer the kitchen is in complete disarray.
 
Appliances get disconnected, cabinetry is empty… who knows where you’ll prepare food as this is going on. It’ll make sense to get the project done as efficiently and quickly as you can. That is an excellent reason to allow an expert kitchen painter to get it accomplished.
 
Spend Money Wisely
 
In the kitchen, you will require the proper finish to withstand moisture and temperatures. If you are doing a more complicated job, you will require more than masking tape and paint.
 
The kitchen painter is going to be familiar with all of the products to get the task done correctly. And, they will probably have relationships with vendors to receive the best price, as well.
 
They’ll Perform the Prep Work
 
Masking edges inside the kitchen is an involved procedure. You will want to keep paint off your appliances, cabinetry, tile, and molding. The kitchen painter will ensure drop cloths cover counters and flooring, as well.
 
There is wall space to be painted behind the stove and refrigerator. Guess what? These will have to be moved and disconnected. The majority of painters will take care of this for you.
 
Palette and Color Selection Tips
 
The color palette in your kitchen ought to complement your flooring, countertops, and cabinets. An expert painter will help you with that.
 
They’re familiar with modern color palettes and painting trends, which will narrow down your options. Since painting is a major task, it is best to have an experienced eye check it before the job starts.
 
They Deal with Complicated Projects
 
Some kitchen jobs are more challenging than others. If you’re painting cabinets, you will require different preparatory work to ensure that the paint sticks to the surface. There is a process to it.
 
The kitchen painter is familiar with priming, stripping, and painting various surfaces. It’s possible to trust their work quality, even for the most complicated jobs.
 
They Provide Skill and Talent
 
Painters arrive to your job with years of expertise. You will have clean lines without any bleeding at the corners.
 
Professional painters are familiar with how to paint utilizing modern methods. Also, they have the proper tools to get the look you’re after.
 
Attention to Fine Details
 
The attention to detail you’ll receive as you hire an expert painter is second to none! You will not see a stray drip on your counters or floor. Everything is returned to its correct place and reconnected.
 
For more information on our painting services contact Madani Group today!


Read More

Fence Paint Colors That Freshen Up Your Curb Appeal

10/30/2018

 
Picture


​
​Curb appeal: it refers to how folks see your house when they are passing by on the road. If there’s a fence in front of your house, of course, it may play a huge role in creating the curb appeal of your home.
 
What are the Best Paint Colors for the Fence?
 
If you wish to make your garden the spotlight of the show, select a color that’s different than the ones discovered in your plants. Darker shades may make your yard and home feel bigger, since they permit your landscape to shine. Lighter shades usually draw your eye forward, which potentially can make your lawn appear smaller.
 
Most folks want their fence to mix in with the space rather than being the primary feature; therefore, be certain to remember this when you are choosing a color. When it is time to paint the fence, there are some things you should consider as you choose a color of paint.
 
Black
 
While a black-colored fence may seem a little intense, it’ll act more like a neutral. Black’s great for a more modern-day feel in your lawn, as it has a little more edge than lighter shades. What makes it such a fantastic option is that it actually allows your foliage and plants to stand out. The textures and colors will pop against the black backdrop.

Picture
                                                 
​Blue
Blue fences are fun ways to add a pop of color to the yard. It’ll work well if your house is already painted neutral colors, such as white, gray, beige, or softer hues. It’ll add some visual contrast and helps make your house stand out.
 
Gray
 
Gray is a classical neutral that pairs well with every home style. It is a versatile color that goes well with everything from classic picket fences to edgy modern style fences. The great thing about gray, is that it’s possible to select either a gray paint, or gray stain. A gray stain provides you a bit of color while permitting the natural wood grain to shine through, while paint is going to provide a solid color; not show off any natural wood.
 
Natural Wood Stain
 
If you actually prefer showing off the natural appearance of the wood, try a stain rather than paint. Stain is available in a number of shades, from dark brown to clear, and an array of other shades, too. It’s an excellent choice for house that have a more natural or rustic appearance.
 
White
 
White’s an outstanding choice for more traditional style house. It is the epitome of classical curb appeal—folks oftentimes picture a home that has a white picket fence as being the ideal image of a house. White’s ideal for houses which already have white trim as the accent upon the exterior of the home, as it’ll create a cohesive appearance. White’s perfect for gardens that have brightly colored plants and flowers, since it actually allows the colors to pop.
 
For more information on our trained painters in Winnipeg, contact Madani Group today!


Read More

What are the Different Types of Exterior Paint Finishes?

10/26/2018

 
Picture
​There are so many kinds of exterior paint finishes; how will you know which one to select for your house? All of it depends on the kind of siding there is and what matters the most to you: durability or hideability. Here is our in-depth breakdown to assist in simplifying the process of selection for you.
 
Choosing a Sheen
 
The sheen of the paint refers to the quantity of shine it holds. It’ll fall some place between high gloss and flat paint. You will want to have at least 2 kinds of sheens on the exterior of your home to assist in offsetting each other. Otherwise, your home will appear one-dimensional and too flattened.
 
Flat
 
Matte, or flat finishes soften the exterior of your home’s look because there aren’t any overlap marks as it is rolled or brushed. Also, they conceal blemishes on the surface because of their lack of light reflection and porosity. They’re fantastic for body siding, especially if it’s designed of wood. Remember that since the paint is hardest to clean and gets soiled quickly, lighter paint is going to show it more.
 
Kinds of Exterior Paint Finishes
 
Satin
 
An eggshell, or satin finish is the universal choice for siding because it’s low-reflective and thereby great at concealing surface imperfections. The gloss is higher than flat. This makes it easy to clean. Due to this it goes well on spaces that require regular cleaning, whether the siding be designed of vinyl, steel, fiber cement, aluminum, or stucco. If you love how this paint looks yet want to utilize it in a high traffic space, it’s possible to locate a deck and porch satin paint especially made for heavy use.
 
Semi-Gloss
 
Semi-glosses give a shinier sheen and make it easier and more durable to clean. Also, it stands as a paint that is more moisture resistant. It goes great on trim work which will be most exposed to harsh weather conditions, such as gutters, window sills, or garage doors, yet do not use it to cover larger spaces. Stick with utilizing it to draw attention to your home’s architectural details. Additionally, consider this kind of paint if you have kids who’ll be propping items or tossing mud against your home’s side.
 
High-Gloss
 
High gloss finishes are resin-rich, adding richness and depth to colors. They act with resiliency and repel dirt. The finish is going to call the most attention to flaws so you have to be careful while applying it and utilize it sparingly. High-gloss will work well upon surfaces you come close to, such as shutters or doors, yet utilize too much and your home will appear like plastic. If you need to apply it to your flooring, buy a floor paint and add some sand in because glossy paint gets slippery and requires additional grit for safety purposes.
 
If you have no experience painting, then this job is best left to the professionals.
 
For more information on the best exterior painting company, contact Madani Group today!
 

Read More
<<Previous
Forward>>
Powered by Create your own unique website with customizable templates.